Close

My First Rap Video

Posted on by Joe Cavazos

I love it when I get the chance to colab with my brother OZ, our one man video team.  Being that I was the closest thing to a rapper in our building they got me to lay down the rhymes for the track.  Oz and Andrew came in in with the hook.  Turn up your speaker and kick up the bass! 


Related Posts: 

Splish Splash Summer Camp Fun!

Video a la "In plain english"

From Photo-shoot to Finish Piece

Posted on by Joe Cavazos

Last week I met with the high school youth pastor to talk about their upcoming Beatitudes series.   After throwing around some ideas we both agreed on doing something that involved a strong image.  

He quickly volunteered the in-house school of discipleship students to brave the heat for this photo shoot.  

Out of over 100 pics I took that morning, I ended up going with this overexposed one shown below. I'm sure this would make most photographers cringe, but it really worked with what I wanted to do.  The wireless flash on the floor gave it some interesting lighting.  

"Blessed Are" Photos


I brought the photo into camera raw to do my initial image processing.  Best part about this is that it's non-destructive editing.  Bumping up the clarity gave that shadow look behind the models.  The rest of the processing was done in photoshop. 


"Blessed Are" Photos

Before finishing the photo-shoot I took individual head shots of the models.  We later decided that these would make great posters for the room.  

Final "Blessed Are" Graphic


Big thanks to the students who helped out on this photoshoot and those from the CMLAB who helped me finalize this project.  

I have included a low res PSD file here if you are interested in seeing the rest of the image processing.  If you have any questions feel free to ask below.


Related Posts:

 The Making Of "The Family Works" Graphic

Before&After: Mexico Outreach Booklet

Burgers, Fries & Graphics


Encounter Graphics Time Lapse

Posted on by Joe Cavazos

Below is time lapse video of me designing this sermon series graphic.  Because of the crazy schedule this week I had to work on this over three days in bits and pieces.  I have to thank all the design peeps, from the Church Marketing Lab & tweeter world, that gave me some great suggestions to finalize this.  

The track on the video is "Mystery" by Phil Wickham.  Great music when working with stars & galaxies.  

Encounter Series #2

 Related Posts

One Minute Through My Eyes (another time lapse video)

GRATIS: Free Textures

Toola of the Trade

The Making Of "The Family Works" Graphic

Posted on by Joe Cavazos

The "Family Works" logo has to be one of my favorite pieces I've done here at PVC. Now I can't go back and repeat the exacts steps I took to get to the final image but I can break it down layer by layer. Note: This not a tutorial but more of a break down. If you have any questions drop me a line down below.

Download the PSD source file here.


I started it all with my favorite stars pic.


I recycled these color gradient bars off a vector art from istockphotos.com. In photoshop I made two copies of the of the bars and adjusted the perspective to give it that corner look. I also added some masks to give it some opacity as it stretch to the edge of the graphic. I then grouped the two into a smart object.


I added a smart filter blur with a mask so I could have it blurred towards the back where the bars meet in the middle. I also changed the blending mode to hard light.


Then I added a curves adjustment layer and darken the image up, I masked out the middle to give a vignette look.


I duplicated the stars layer, increased the size and flip it. After that I add a gaussian blur and changed the blending option to screen. This made so just the star clusters would show.


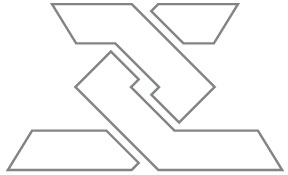
For the logo I used a basic font in Illustrator and extended portions of the letters to make the future i-beams. NOTE: I find it easier to work with the 3D lighting in Illustrator when the art is a light grey or white.


I used the 3D extrude & bevel filter to create the basic frame of the logo.


I brought the logo in as a smart object into photoshop. I added a color effect with the blending mode set to color. I also added a gradient with the blending mode set to multiply. This added some darkness to the bottom of the logo.


To get the i-beam look I drew 2 shapes. One is for the inside part of the beam and the other the far back side of the beam. I also added a gradient from left to right to give it some shading.


Then I brought in a metal texture and used the selection of the original logo to place a mask on the texture.


I then set the blending mode of the texture too overlay.


I made a duplicate of the original smart object logo. Added a blur to it and then changed the blending mode too color dodge. This is what gave the text art a glow.


For the bolts I went back to illustrator, created a simple hexagon and used the 3D extrude filter on it. On a side note: I wanted to make sure to get the angle and proportions right on the text art. To do so I took a screen shot of the logo in PS and place it in Illustrator to use as a backdrop.


I brought the bolts into PS and added some color along with some lines.


For the various gears I used some more stock vector files.


I brought them into photoshop and added color layer effects. On some of them I added a black & white gradient with a blending mode set to multiply to give it some shading. In addition to that I applied a smart filter blur to help give it a greater depth of field.


The Family Works

To finish it off I created a new layer and filled it with a diagonal line pattern. I changed the blending option to soft light. Here's a place where you can see some tutorials on line patterns.


Related Posts:

The Family Works Series Design

One Minute Through My Eyes

Burgers, Fries & Graphics

Posted on by Joe Cavazos

"WHY" series graphic

Last Friday I had one action item left for the week, "design WHY series graphic".  Honestly my brain was already thinking about how much German sausage I was going to consume in Fredericksburg during Lu and I weekend getaway.  It usually takes me a while to finalize series graphics.  At times I like to work on it and shelve it for a day or so and go back to it.  This time I was determine to get it done.  The whole piece quickly came together in about three hours. 

So I sent a proof out, crossed my fingers and waited.  Pretty soon I got a response back that it was good to go with a minor tweak.  Yes, no revamp no having to go back to the drawing table (ok, so i don't really draw). I love it when that happens.  I find satisfaction when I'm able to translate the passion and message of the communicator into graphic form. 

How come this project came so easily?  I'm not that good.  I soon realize it was the burger and fries that the youth pastor invited me to a couple of months back.  We chatted about the "why" series he was wanting to start in the summer.  I was able to hear his passion and reasoning behind the series.  That's something you just can't get from a request form. 

That morning as I worked on the graphic I kept referencing back to our conversation.  I believe that graphic wouldn't be what it was if those conversations would not have happened. 

I learned a valuable lesson this week, something that maybe I have overlooked before.  I am at my best as a graphic artist when I am able to hear the heart and passion of the communicator. 

I want to challenge all my deisgn peeps out there to look pass the deadlines, requests, creativity, etc., and have some conversations with those you are designing for.  And if you work with a designer, I challenge you to take them out for burgers and fries.


Related Posts:

Put The Camera Down!

We made the swtich to HD!

Peanut Butter & Jelly


The Family Works Series Design

Posted on by Joe Cavazos

We just started a new series this past weekend titled "THE FAMILY WORKS".  We wanted something fresh and fun that would carry over 8 weeks.  

The Family Works

A few days before going to print we had a change of direction along with a new series title.  The whole process was stretching but also came with a great sense of accomplishment when finished.  

I have to give some props to the team members here at PVC  that helped me push through the design. I love that these guys aren't impressed with my bag of tricks but can tell it like it is.  

I'm sure it would have been easier to create this using some sort of 3D software but I can't use what I don't have.  I created the basic shapes in Illustrator and apply the 3D bevel effect. After bringing the pieces into photoshop I adjusted colors, and added textures.  I also used some blurring effects to give it some depth.   

The Family Works Worship Guide

One of the things we like to do every quarter is switch up the worship guide layout.  This is a pretty basic layout nothing fancy just cut to bleed and folded in half.  The simplicity of the layout helped give more real estate for body copy.  I was able to bump up our normal body text up one point.  (very exciting stuff, well at least for those with reading glasses)

The Family Works

The production team came up with a sick stage design.  Thank God for volunteers, air guns & spandex.  They were able to transform the stage in 2 days.  They built a 14ft x 7ft screen for the middle and mounted a old projector to splash stills and video.  


Related Posts:

Before&After: Worship Guides AKA Bulletin

Our Stage In A Year


Outcast Flyer Design

Posted on by Joe Cavazos

Outcast Challenge Flyer

OUTCAST is the theme for a youth conference hosted by GLAD Youth Ministries.  This particular piece is the final flyer design used to promote the Outcast Challenge.  

I'm glad I was able to go beyond my stock collection and include some original photos. The cover photo was shot in the back of the church parking lot and the photo of the kid on the left was shot while on a mission trip in the amazon a couple years back.  Also the kid on the right hand side was shot by friend Mitch Idol on a trip to africa.  

You can watch a time-lapse video of me designing the cover art here.  I also have some texture files, similar to what I used, available for download here

10 church creative lid lifters

Posted on by Joe Cavazos

I believe the best way for me to grow is to surround myself with people that are better then me. People that can raise the lid of predictability. Without them even knowing, these individuals are helping me raise the bar of creativity. Who are some people or orginazations that are helping raise yours?

1.Carlos Whittaker

Among being a christian webblog rockstar he is also the Service Program Director for Buckhead Church in Atlanta. Whatever this guy does whether its leading worship, blogging, taking pics, he does it full of passion and realism.


2. Cameron Smith

Cameron is a graphic designer for Christ’s Church of The Valley in Peoria, Arizona. This guy has some mad skills and shares a love for bulletin layout.


3. Bryan Clark

Bryan is the Senior Graphic Designer for LifeChurch.tv. His designs are gold, you can check out some of his work here as well.


4. Daley Hake

A epic photographer with beautiful lighting and composition. Even though I don't take as much photos as I would like, I can learn a great deal from the compositions and moods of the photos.


5.Barton Damer

Another guy with some mad skills. He's the Creative Director for RT Productions Inc. He pushes the envelope with ways to use media creatively in the local church. His print graphics are great but his motion graphics are sick.


6.

The up and coming Seth Godin of church marketing. Really this guy has a huge passion to see the church communicate with excellence and originality.


Communications Director at Granger Community Church.

Blue Ridge Community Church in Forest, VA.

One Minute Through My Eyes

Posted on by Joe Cavazos

Here's a video of 6 hours of photoshopping condensed into a little over a minute.  I find it very beneficial to see the process morphing from blank pixels into final art.      

I used GAWKER to record the screen shots.