The Making of the "Storm the Gates" Artwork

This is a key art piece I created for my friends at Glad Youth Ministries. "Storm the Gates" is the theme for their youth conference this year. I've had the privilege of working with them for the past five years. They wanted it to have a epic feel and suggested movies like 300 and Gladiator to draw inspiration from.
The first thing that popped into my head, once I heard the title, was having a army of people taking over castle wall. I went to one of my favorite movies for inspiration, Lord of the Rings.
Though conceptually it took a while, the actual constructing of the piece is not very complicated. Below is a break down.

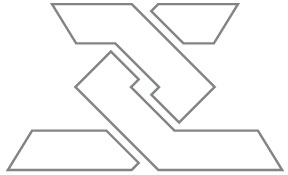
I created the text in Illustrator, using a technique I picked up on making shards of glass. Oonce the text was in outlines form, I drew lines cutting across the text. Selected all and used the pathfinder divide button to cut-up the pieces. Once the pieces where cut-up I selected different sections and shifted them around.

I didn't have a access to castle gates so I had to resort to stock imagery. After searching for a head on perspective, with no luck, I ended up going with the image above. The original images shows a castle wall from the side, since I planned on using it more as a silhouette of the wall, It didn't have to be perfect. I copied and flipped the image and merged them together to form the front of the gate. Once that was complete I masked out the sky and was good to go.

Now the piece was starting to take form and now knew layout wise where I wanted to go. I used some splatter brushes from bittbox.com to mask out parts of the wall as well as adding textures to the text and rest of the piece.

The image above shows the clouds that were composited into the background.

This is the crowd image I used. Again alot of masking with the splatter brush and soft-brushes were added to this image.

At this point a dark background was added towards the bottom of the piece. A couple of overlaid textures where added as well. Using the Hue/Saturate layer effect some blue tint was brought into the piece. And with a soft brushed masked out a few areas that I wanted to keep black and white.

Last, the color was added, I added a layer with color on top of everything and masked out the areas I didn't want. I made sure to add the highlight glow on the heads to give the appearance of light being cast from the distance.
That's the basic breakdown of this piece, there were several other details that went into the making of the this piece. Hopefully this shows how to take different images and make them work as one piece. If you have any questions feel free to drop me a line below or hit me up on the contact page.
Related Posts:
The Making of the "The Family Works" Graphic